Titan 300 TGL-UP3

Welcome to your Titan 300 TGL-UP3. This guide will help you quickly set up and start using your new Titan 300 TGL-UP3, a rugged, industrial box PC designed for high performance in demanding applications.
Powered by 11th Gen Intel® Core™ and Celeron® processors (codename: Tiger Lake UP3), the Titan 300 TGL-UP3 delivers significant computational power in a fanless and compact form factor. It is ideal for a wide range of applications, including industrial automation, safety & surveillance, smart devices, and medical applications. This guide will ensure your first setup goes smoothly.
Before You Begin
What's in the Box?
Inside your Titan 300 TGL-UP3 package, you should find:
- The device itself
- Mega-Fit 2p RA Power Connector
- (Optional) DIN-rail or Wall Mount brackets
- (Optional) Dipole antennas for Wi-Fi/LTE modules
- Product documentation
If you ordered specific optional kits (like the 4G/LTE module, cooling fan, or additional USB/COM ports), they will be included as separate components.
Essential Peripherals (You'll Need These – Not Included)
To get started, you will need:
- Power Supply: A DC power supply providing a voltage between 12V and 24V.
- Display: A monitor with a DisplayPort or a USB Type-C input (supporting DP alternate mode).
- Input Devices: A USB keyboard and mouse.
- Operating System (OS): If your device isn't pre-loaded, you'll need your chosen OS image on a bootable USB drive. Supported OS include Windows 10 IoT Enterprise LTSC 2021 and Linux (Kernel 5.4).
- Network Cable: An Ethernet cable for wired network access.
Safety First!
- Read the Manual: Always read the full safety instructions in the main User Manual before installation.
- Power: Always power off all sources before connecting or disconnecting peripherals. Use only a power supply within the specified 12V to 24V DC range.
- Environment: Ensure the device operates within its specified temperature range. It is the customer's responsibility to verify that the temperature remains within this range and, if necessary, adopt additional cooling solutions.
- Industrial Range: -40°C to +60°C
-
- Commercial Range: 0°C to +50°C
Hardware Overview & Connections

The Titan 300 TGL-UP3 is a fanless embedded computer featuring 11th Gen Intel® Core™ i7/i5/i3 and Celeron® SoCs. It supports up to four independent displays at 4K resolution (or one at 8K) via its Intel® Iris® Xe graphics architecture. The system supports up to 64GB of DDR4-3200 memory, with IBECC support on industrial processor versions.
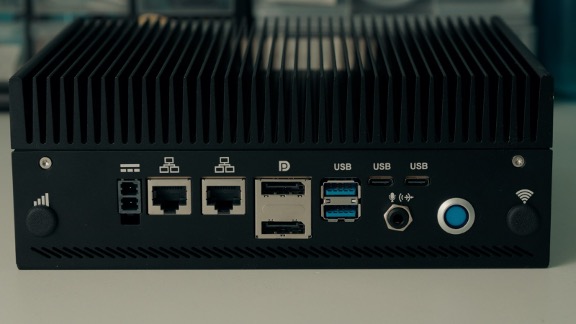
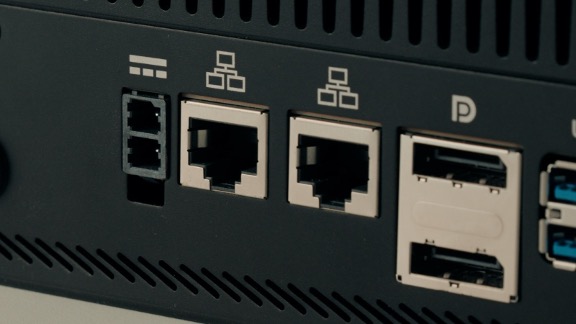
Key Ports and Connectors
- Power Input: 1x Mega-Fit 2-pin Right-Angle connector for 12V to 24V DC input.
- Display Outputs:
- 2x Multimode DisplayPort 1.4 on a dual DP++ connector.
- 2x Multimode DisplayPort 1.4 on USB Type-C connectors (alternate mode).
- USB Ports:
- 2x Superspeed USB (10Gbps) on Dual Type-A sockets.
- 2x Superspeed USB (20Gbps) on USB Type-C slots.
- Network (LAN) Ports: 2x 2.5 Gigabit Ethernet RJ45 connectors.
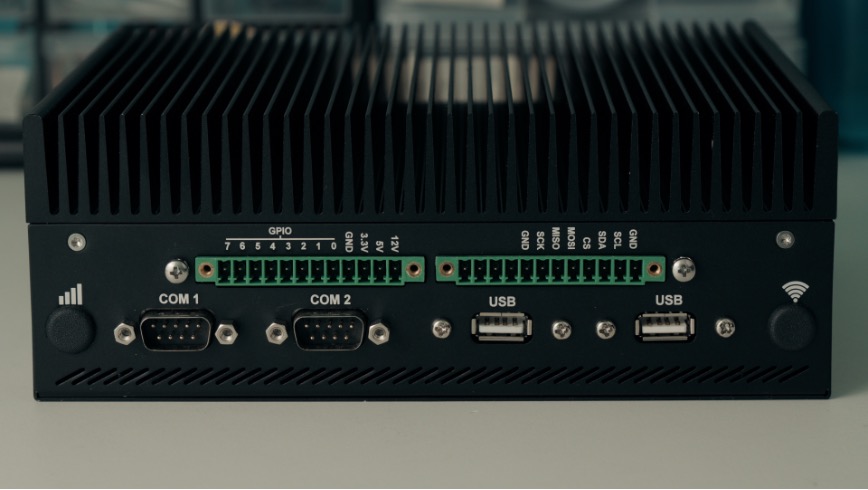
- Serial Ports: 2x RS-232/RS-422/RS-485 configurable UARTs on a DB9 connector.
- Audio: 1x Line-out + Mic-in combo TRRS Audio Jack.
- SIM Card Slot: 1x Mini-SIM slot for use with an optional M.2 LTE modem.
- Other Interfaces:
- Power ON Button.
- Optional 2x 12-pole terminal block with 8x GPIOs, I2C, SPI, and multiple voltage outputs.
Internal Expansion
- Storage: On-Board NVMe Drive, up to 2 modules with a total capacity of up to 1TB.
- Connectivity Slots:
- Optional M.2 Wi-Fi (802.11 ac/a/b/g/n) + BT 5.0 module.
- Optional M.2 LTE modem.
- Security: Optional on-board TPM 1.2/2.0 module.
Refer to the main User Manual for detailed instructions on accessing internal components and installing modules/drives.
Physical Installation
Before you begin, ensure all power sources are OFF.
DIN Rail Mounting
- Ensure all power sources are OFF.
- Align the device with the DIN rail using the optional factory-installed bracket.
- Snap the device securely into place.
Wall Mounting
- Again, power OFF first.
- Secure the unit to a flat surface using the optional factory-installed wall mount brackets.
- Ensure you use appropriate screws for the mounting surface.
Connecting Peripherals and Power
- Display: Connect your monitor to one of the DP++ outputs or to a USB Type-C port that supports DP alternate mode.
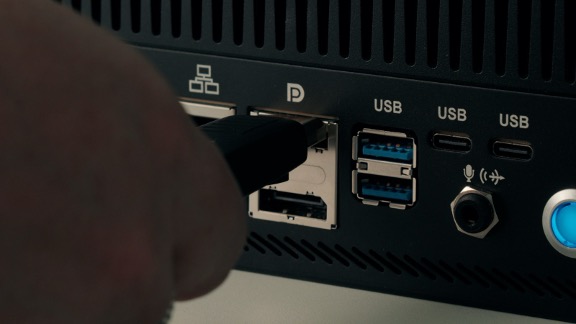
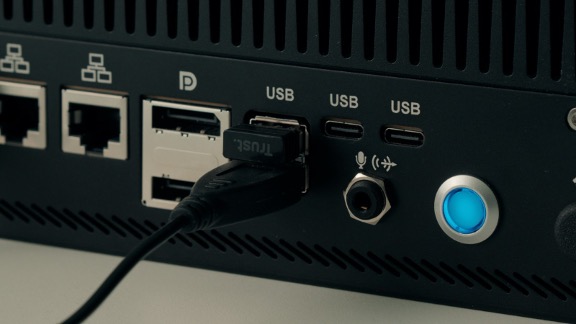
- Keyboard & Mouse: Connect your USB keyboard and mouse to the Type-A USB ports.
- Network: Connect an Ethernet cable from your network switch to one of the 2.5 GbE RJ45 ports.
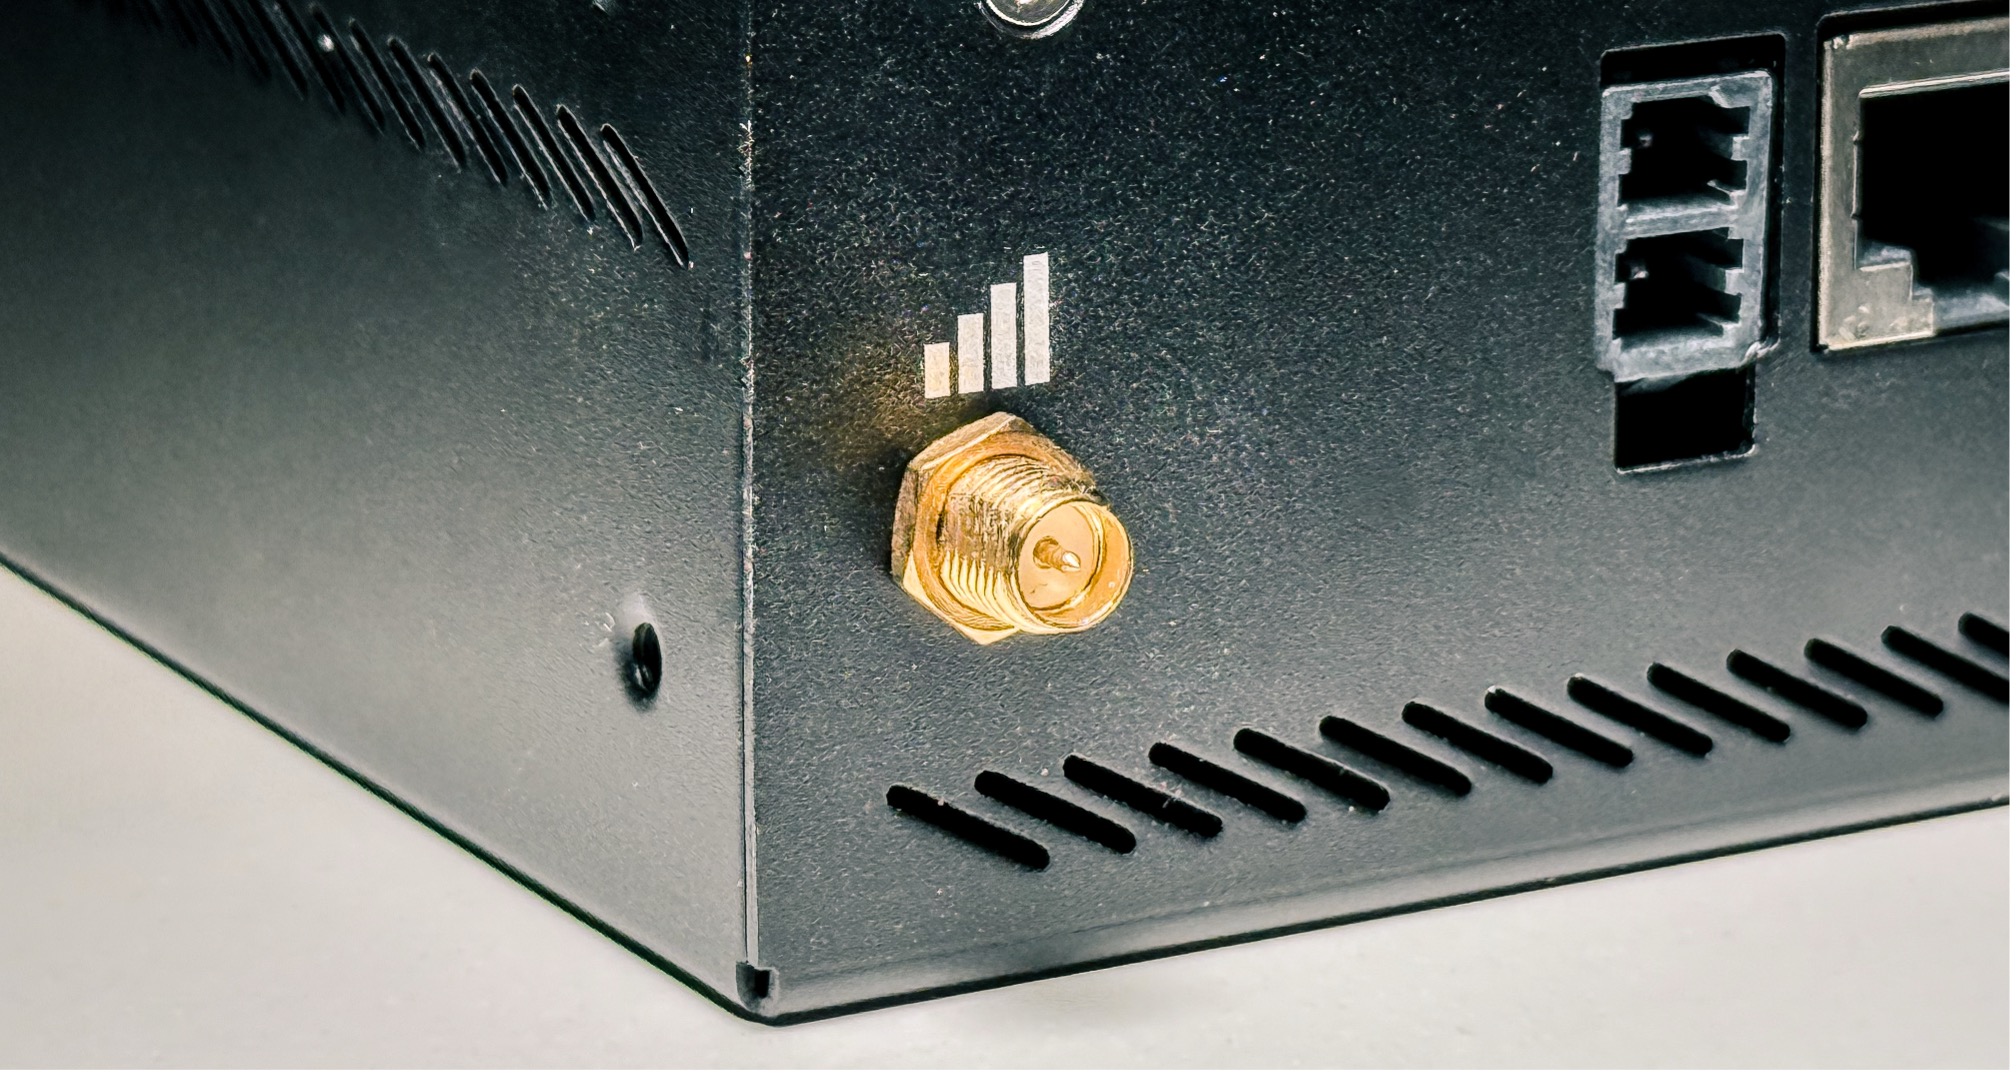
- Antennas (If applicable): Securely attach the dipole antennas to the designated connectors if you have the optional Wi-Fi or LTE modules installed.
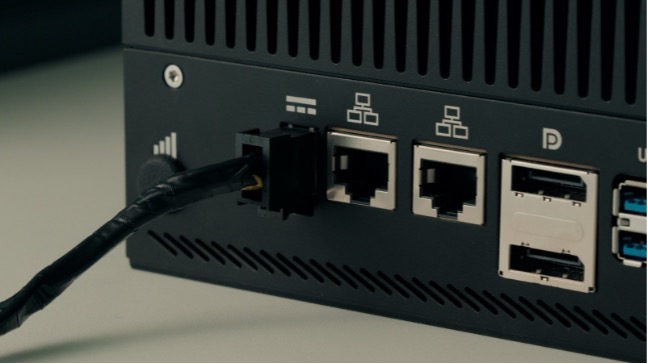
- Power: Connect your 12-24V DC power source to the Mega-Fit 2-pin connector.
First Boot & Software Environment

- Powering On: Once all peripherals are connected, press the power button to turn on the Titan 300 TGL-UP3.
- Initial Boot: [Observe the LED indicators. The [Power LED] should illuminate. You should see boot messages on your connected display]
- Operating System: The Titan 300 TGL-UP3 supports Microsoft® Windows 10 IoT Enterprise LTSC 2021 and Linux (Kernel 5.4 version). It can also come preinstalled with SECO's Clea OS.
- Installing an OS:
- Access the BIOS/UEFI settings by pressing [Specify Key, e.g., DEL, F2] during startup.
- Ensure your bootable USB drive is set as the primary boot device.
- Follow the on-screen instructions to install your chosen OS.
On first boot:
- Make sure the operating system is up to date.
- Read more on and set up your connection to a Clea instance – please check section “References and Useful Links” below.
- Load or deploy your AI applications via Clea's SDK or web tools.
Features like remote configuration, device monitoring, and secure software deployment are available out-of-the-box when using Clea OS.
Basic Configuration / Connecting to [Network/Clea Cloud]
- Connecting to Clea instance:
- The Titan 300 TGL-UP3 typically comes preloaded with Clea OS.
- Use Clea Portal or Device Manager for software configuration.
- Features like remote configuration, device monitoring, and secure software deployment are available out-of-the-box.
Basic Troubleshooting
-
No Power: Ensure your power supply is providing a voltage between 12V and 24V and is correctly connected to the Mega-Fit connector.
-
No Display: Check that your monitor is connected to the correct DisplayPort or USB-C port and that the input source is set correctly.
-
Cleaning: Power off the device before cleaning. Use only a dry cloth.
-
Ventilation: The device is fanless but relies on its heatsink for cooling. Do not obstruct airflow around the chassis.
-
Software Updates: For the latest drivers and software updates, please visit
www.seco.com.
For more detailed troubleshooting, refer to the main User Manual or contact support.
Maintenance & Support
-
To clean: power off the unit and use a dry cloth.
-
Monitor system health via Clea or internal sensors.
-
Use only certified spare parts and authorized service partners.
-
Dispose of the product according to WEEE regulations.
-
[Firmware/Software Updates: Regularly check www.seco.com for firmware and software updates
Optional Accessories & Next Steps
Optional Accessories
Enhance your Titan 300 TGL-UP3 with these factory-installed options:
- M.2 Wi-Fi/Bluetooth module with antennas.
- M.2 LTE modem with Mini-SIM slot and antennas.
- TPM 1.2 or 2.0 module.
- GPIO terminal block connectors.
- DIN-rail or Wall Mount brackets.
Next Steps
- Full User Manual: For in-depth technical specifications, please refer to the full User Manual available at www.seco.com.
Need Help?
Contact SECO support or visit www.seco.com for detailed documentation, drivers, and software tools.