Pi Vision 10.1 CM5
Introduction
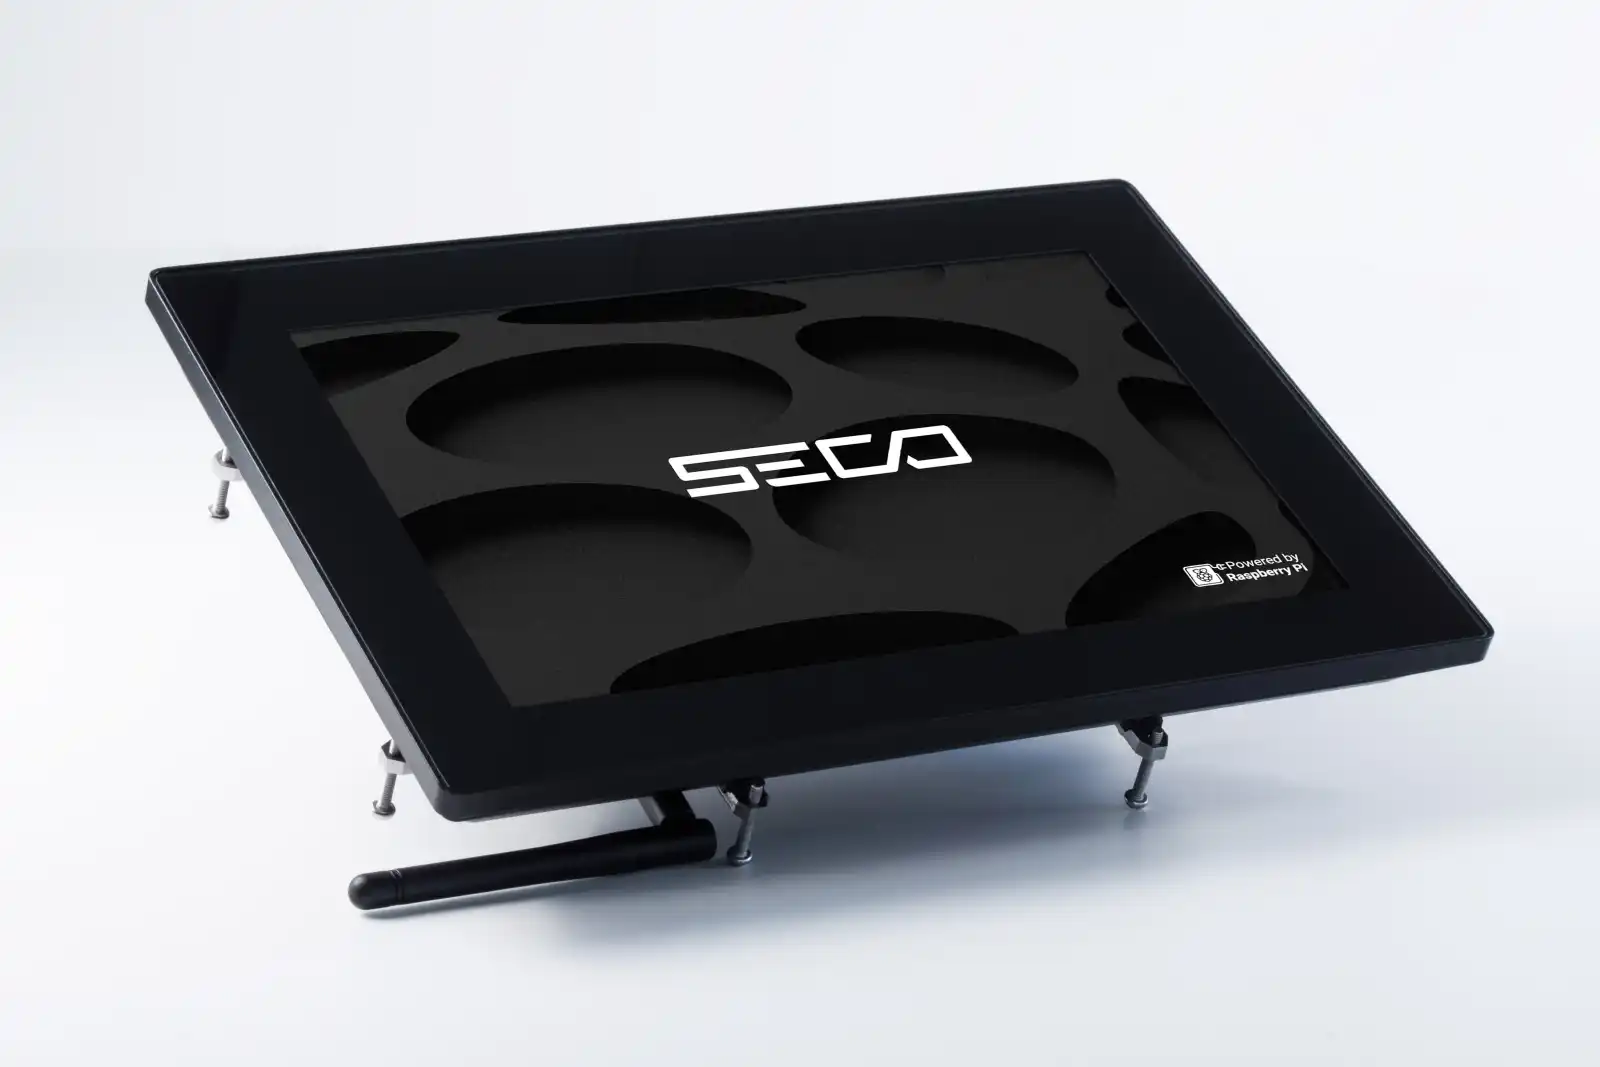
Congratulations on choosing the brand new Pi Vision 10.1 CM5!
This guide is designed to help you set up and configure your device step by step, so you can quickly start using it for industrial HMI applications, edge automation, smart city projects, digital signage, and more.
Built on the Raspberry Pi Compute Module 5 (CM5) and powered by SECO’s industrial-grade reliability, Pi Vision combines the flexibility of the Raspberry Pi ecosystem with robust hardware in a compact, rugged design (27 × 18 × 5 cm).
What’s in the Box
Each Pi Vision 10.1 CM5 package includes:
- 1x Pi Vision 10.1 CM5 HMI unit (Depending on your chosen configuration)
- 1x Set of panel-mount brackets
- 1x USB-C power cable (5V DC)
- 1x SMA antenna for wireless connectivity
- 1x Quick start documentation and compliance sheet
Depending on your configuration, optional accessories may include:
- 1x microSD cards (for CMS Lite models)
- Camera and microphone array kits
- DIN rail or rear-mount accessories
Before installation, ensure all components are present and undamaged.
Before You Start
Requirements
To set up and operate your Pi Vision 10.1 CM5, you will need:
- USB keyboard and mouse (optional)
- HDMI or DisplayPort monitor (for debugging if required)
- Ethernet cable or wireless access point
- 5V DC power source (minimum 3A output)
- Clea Portal or Raspberry Pi OS account access (for OS configuration and updates)
Safety & Handling
- Always disconnect the power before connecting or disconnecting any cables or peripherals.
- Use only UL-Listed power adapters (5V / 5A DC).
- Handle the device with proper ESD protection when installing or maintaining it.
- Operate the unit within safe environmental limits:
- Temperature: 0 °C to +60 °C
- Humidity: 0–95%, non-condensing
- Avoid contact with liquids, dust, corrosive agents, or flammable materials.
- Leave at least 2 inches (5 cm) of clearance around the enclosure for passive heat dissipation.
- Never attempt to open the device enclosure while powered.
Understanding the Raspberry Pi Compute Module 5
The Raspberry Pi Compute Module 5 (CM5) at the heart of Pi Vision brings the power of Raspberry Pi 5 to industrial-grade hardware.
Key features include:
- Broadcom BCM2712 SoC – Quad-core Arm Cortex-A76 @ 2.4 GHz
- VideoCore VII GPU @ 800 MHz for accelerated graphics and video output
- Configurations with or without onboard eMMC storage (“eMMC” and “Lite” variants)
- PCIe Gen 2 support for add-on modules
- Integrated power management IC for optimized energy efficiency
- Long-term software and community support
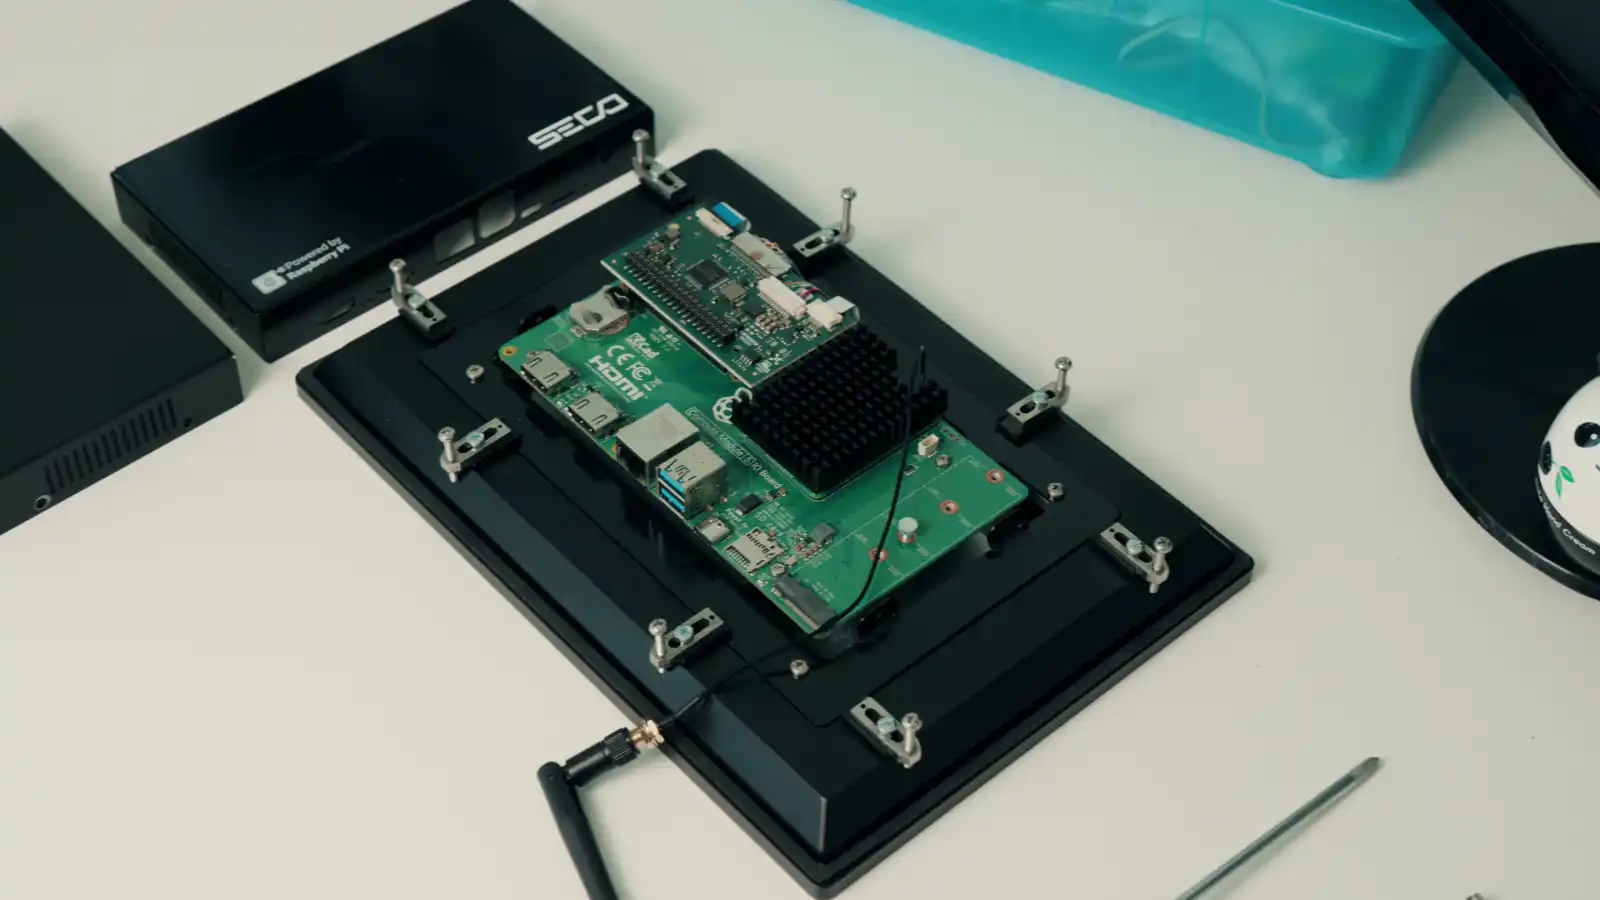
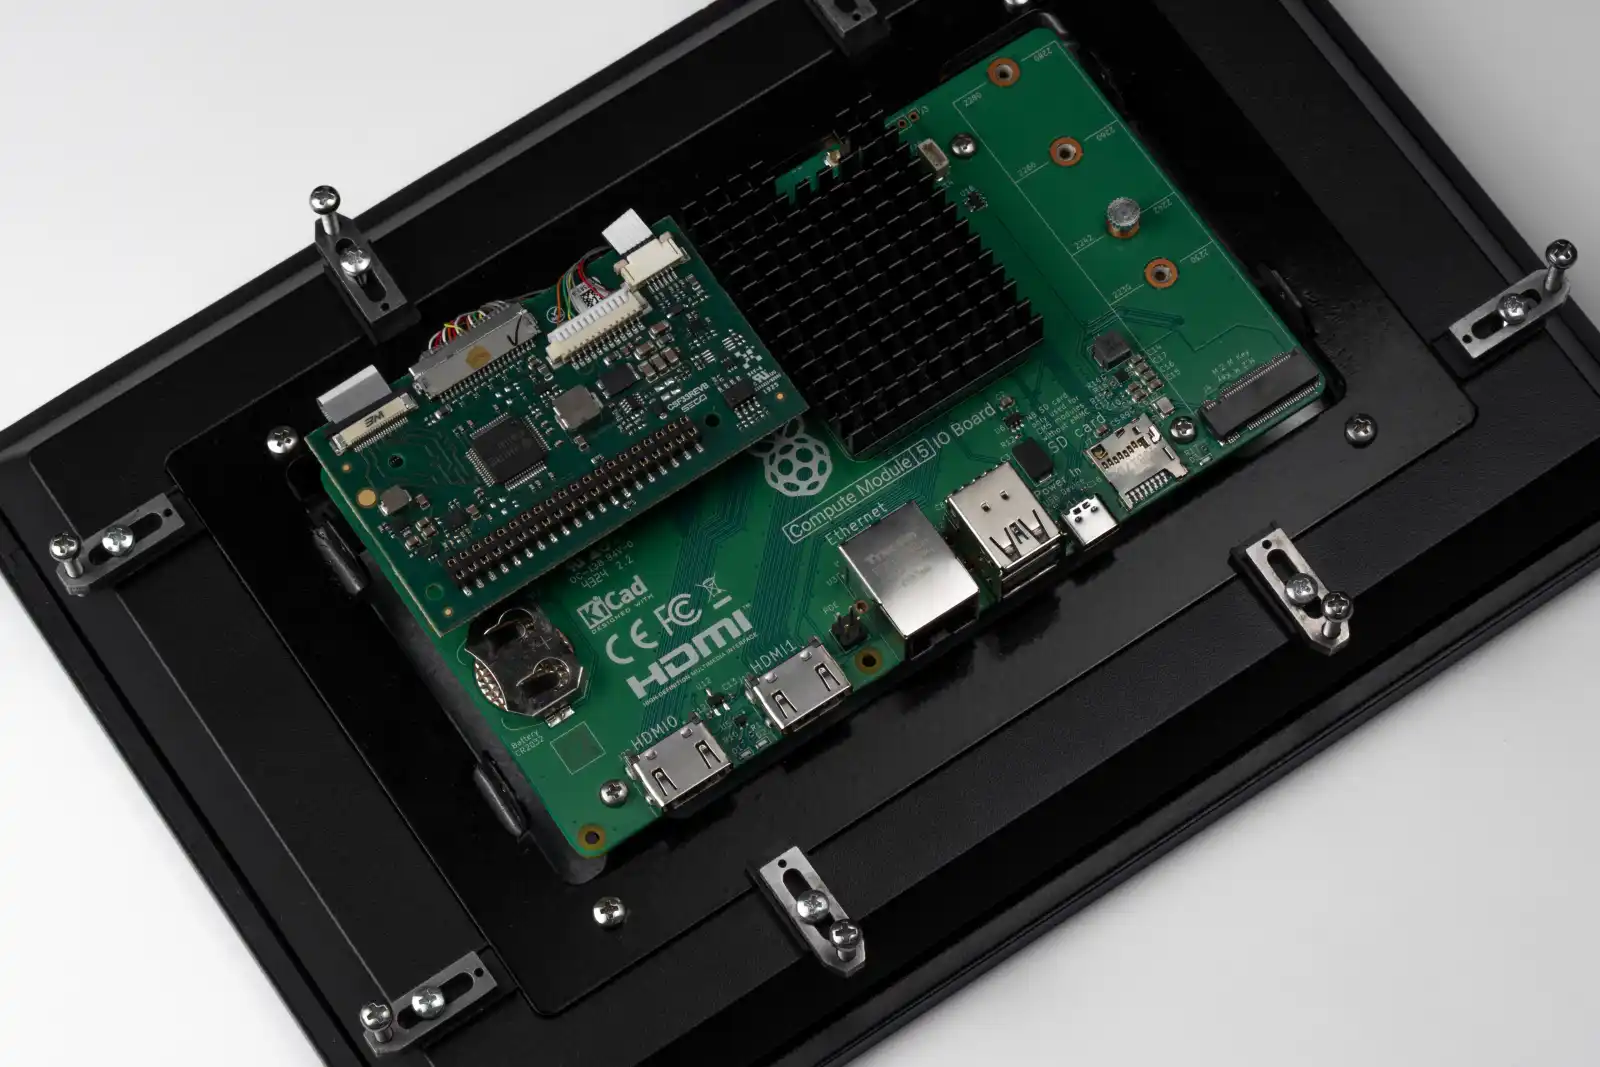
In Pi Vision, the CM5 module is embedded on a custom SECO carrier board, exposing extended industrial interfaces and maintaining software compatibility with Raspberry Pi OS and Clea OS.
Hardware Overview
Let’s take a look under the hood of Pi Vision 10.1 CM5:
-
Display: 10.1” touchscreen, 1280×800 resolution, 400 nits brightness, >50,000-hour lifetime
-
Processor: Broadcom BCM2712, Quad-core Arm Cortex-A76 @ 2.4 GHz
-
Memory: Up to 8 GB LPDDR4
-
Storage: Up to 64 GB eMMC or microSD (CM5 Lite)
-
Graphics: VideoCore VII GPU @ 800 MHz
-
Wireless: Dual-band Wi-Fi (2.4/5 GHz), Bluetooth 5.0
-
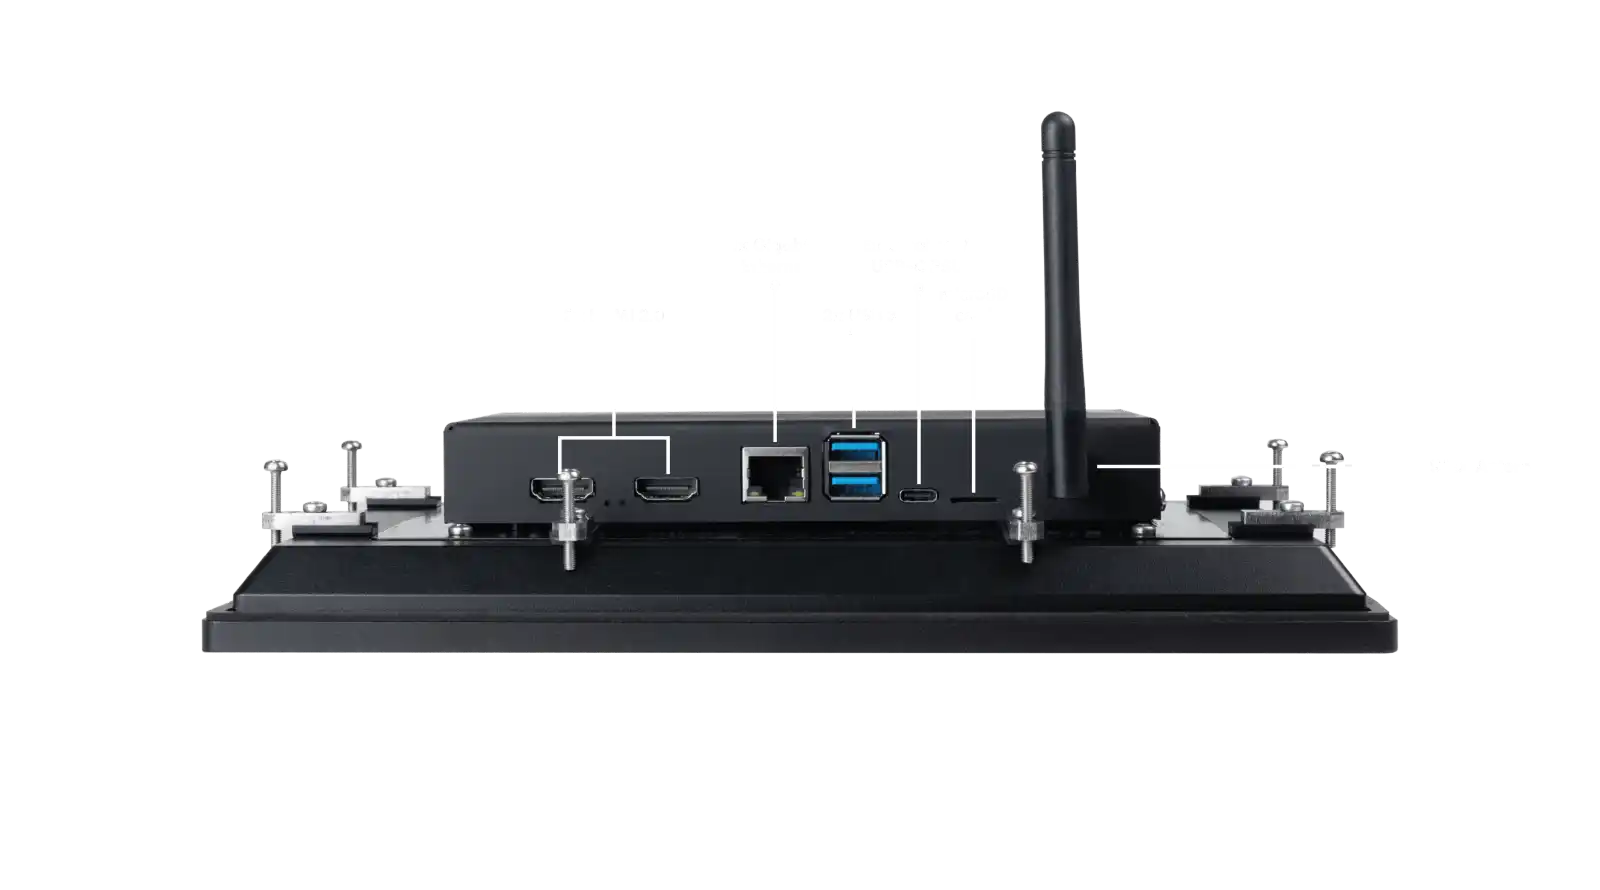
Networking: 1× Gigabit Ethernet with IEEE 1588 synchronization support
-
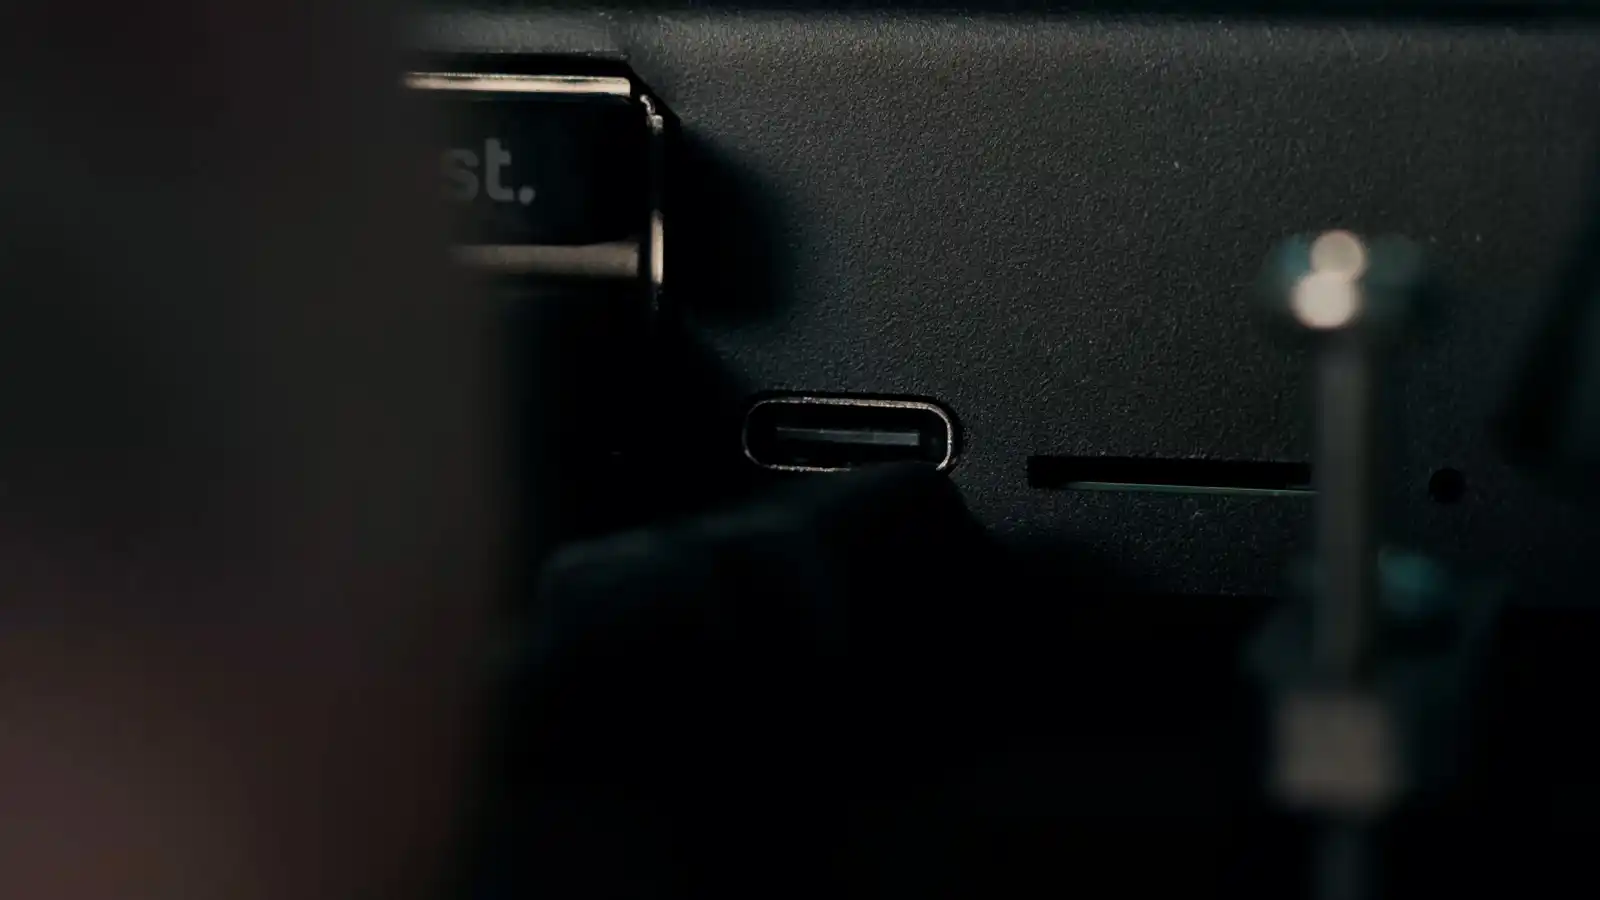
Expansion & I/O:
- 2× USB 3.0 ports
- 1 × M.2 M-key PCIe slot
- 40-pin GPIO header (HAT-compatible) withGPIO lines for UART, I2C, SPI, PWM, SDIO, I2S, and DPI display output
-
Operating System: Clea OS (Linux-based) or Raspberry Pi OS
-
Power Input: 5V / 5A DC via USB-C
-
Operating Temperature: 0 °C to +60 °C

Physical Installation
The Pi Vision 10.1 CM5 supports multiple installation methods for industrial and embedded environments.
Panel Mounting (default)
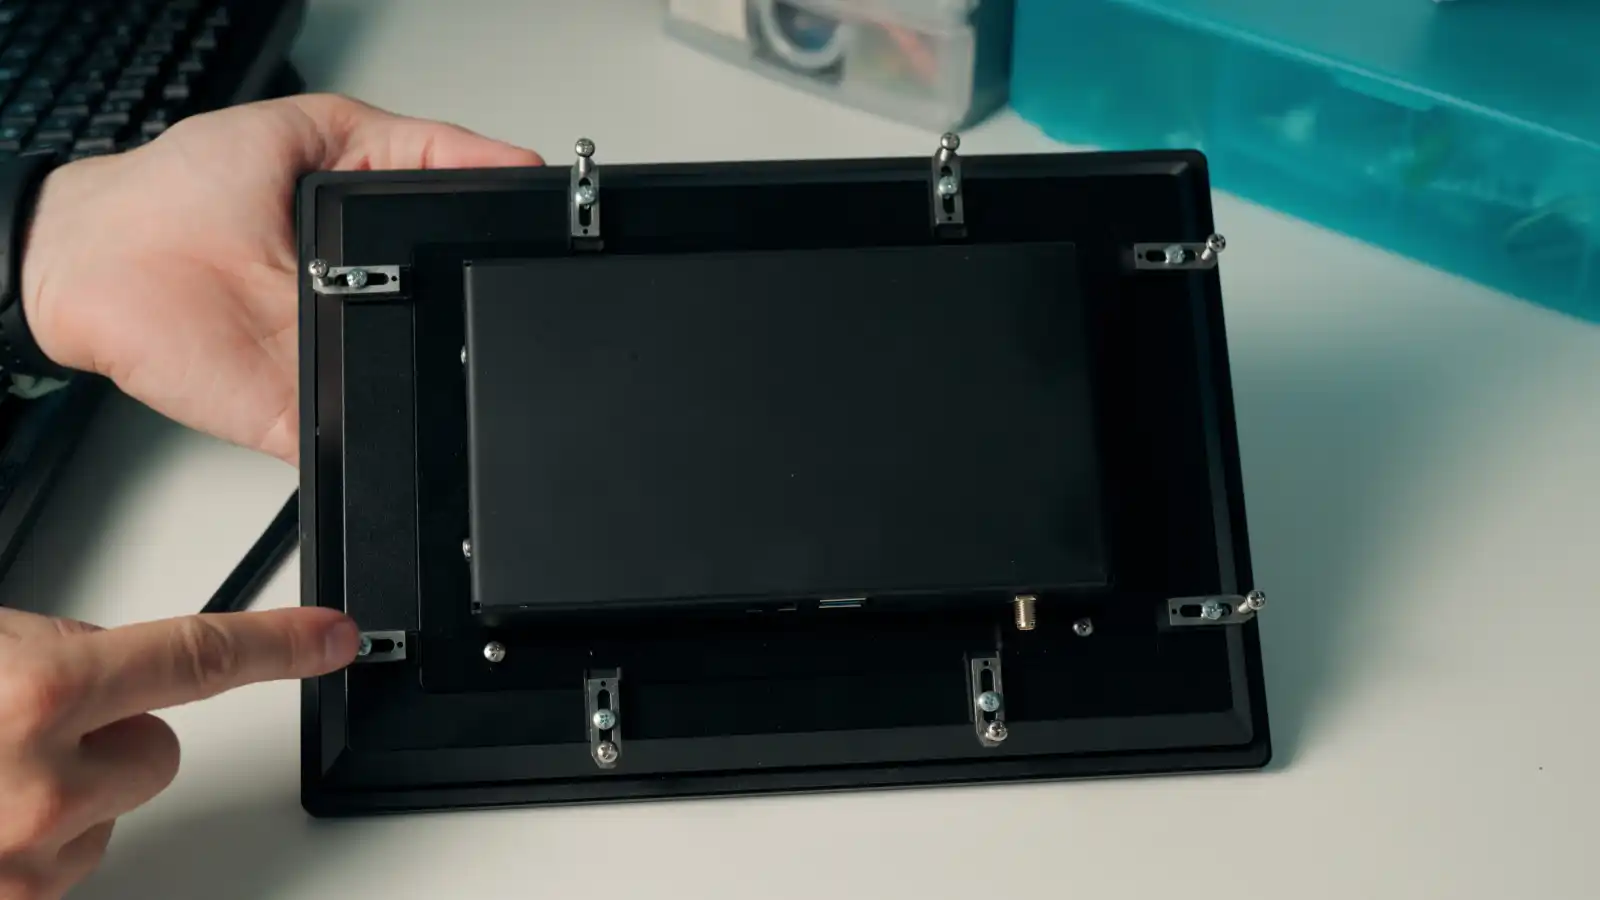
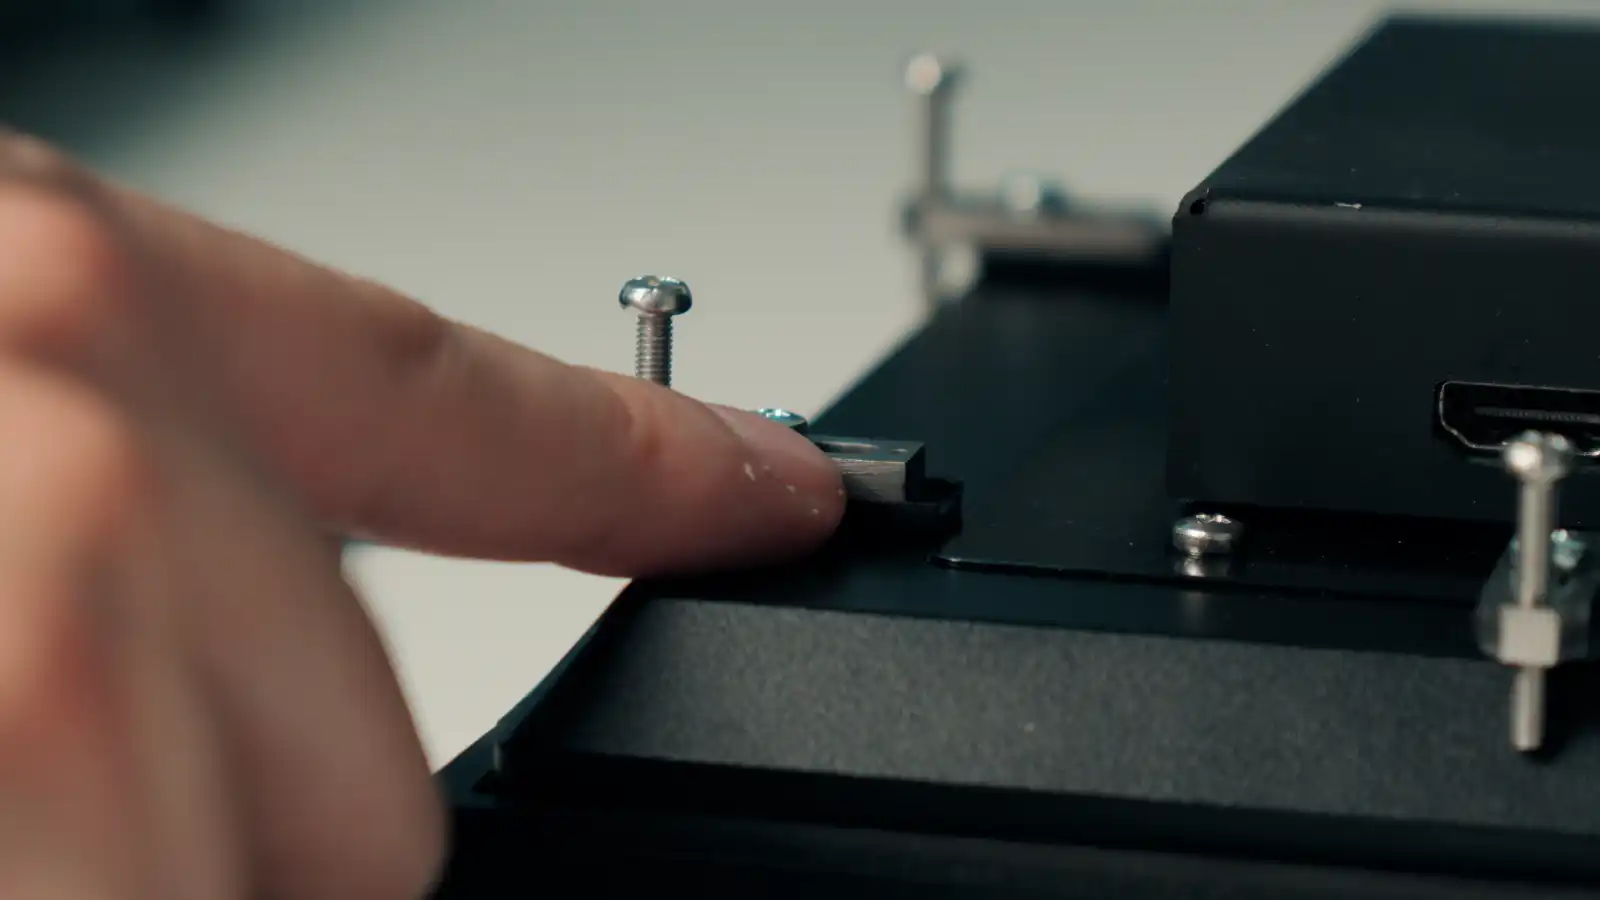
- Ensure the power is disconnected.
- Insert the unit into the control panel cutout.
- Fasten securely with the included clamps.
- Check that the sealing gasket is flush against the enclosure for proper IP protection.
Optional Mounts
- DIN rail adapter (rear accessory)
- Rear-mount frame (for kiosks or custom enclosures)
Make sure to allow enough airflow and cable clearance in any installation scenario.
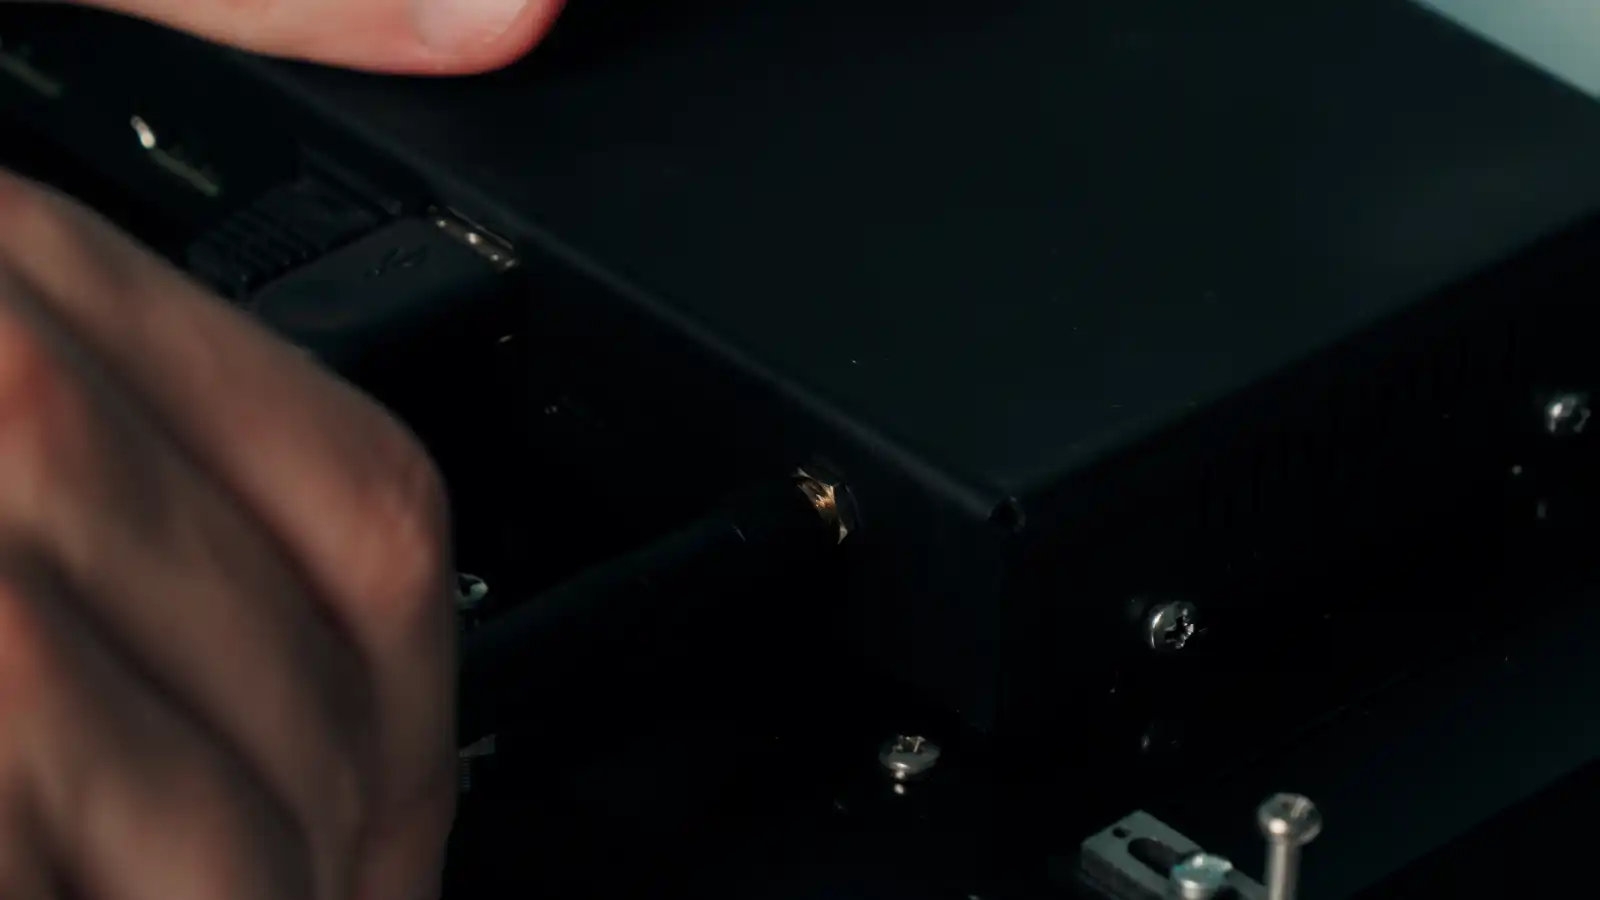
Connecting Peripherals and Power
Before powering on, connect the required peripherals:
- Network: Plug an RJ-45 cable into the Gigabit Ethernet port. Supports IEEE 1588 for synchronized network operations.
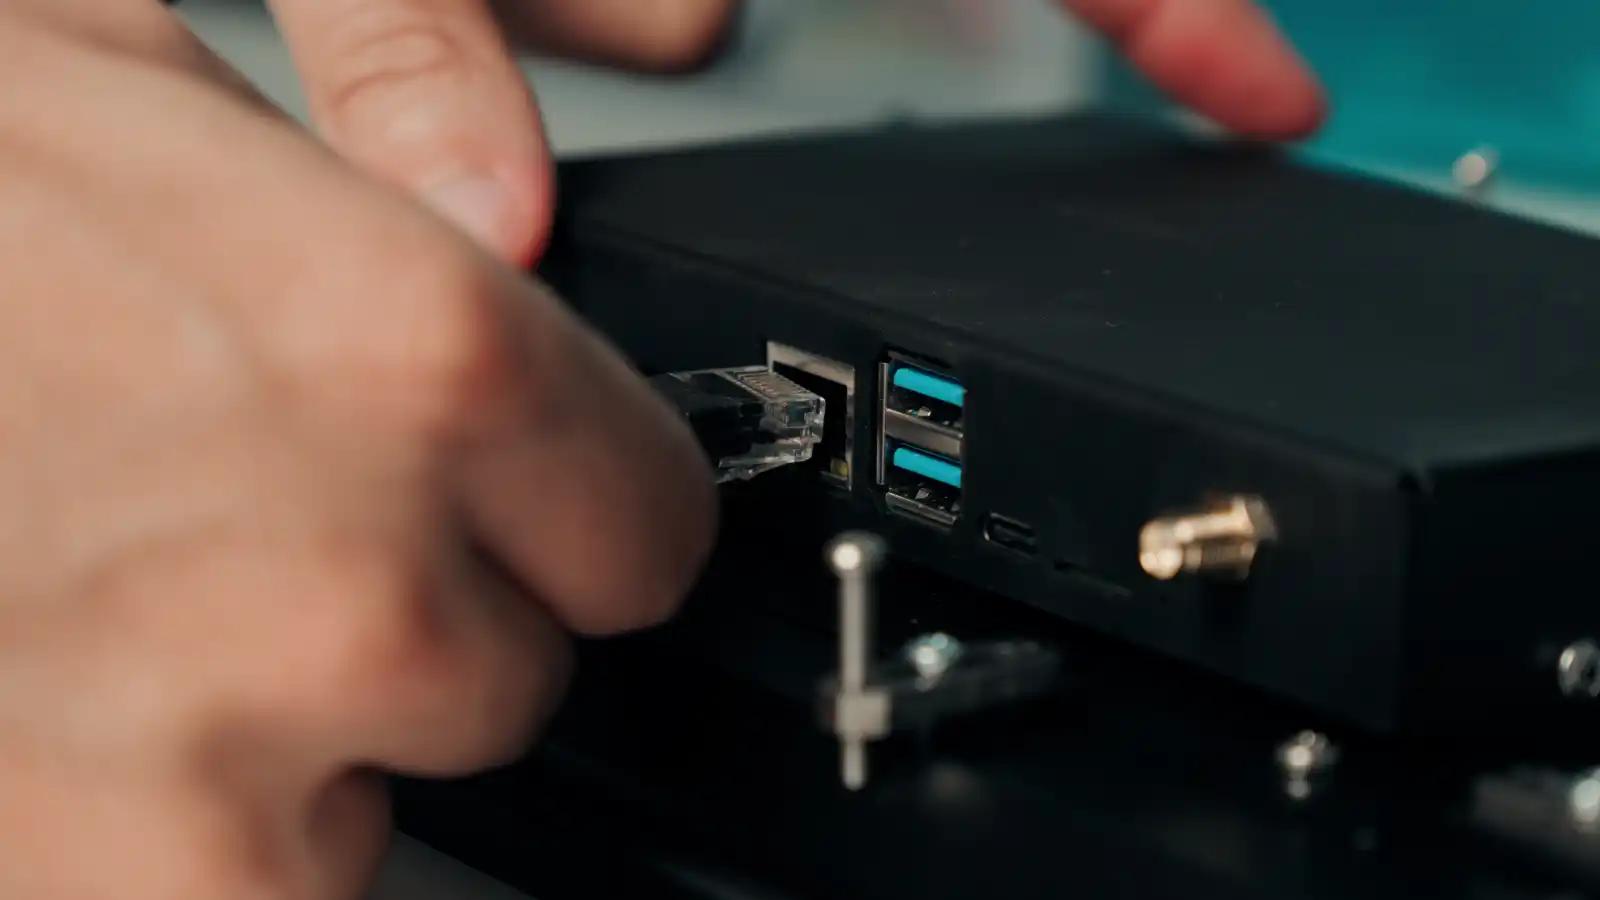
- USB Devices: Use the two USB 3.0 ports for keyboard, mouse, flash drives, or cameras. Since the display is touch-enabled, USB peripherals are optional.

3.Wireless Antenna: Attach the SMA antenna if you intend to use Wi-Fi or Bluetooth connectivity.
- GPIO & Expansion: The 40-pin GPIO header allows integration of Raspberry Pi HATs and sensors.

- Power Supply: Connect the 5V USB-C adapter to the rear power input.
If your configuration includes power-demanding peripherals (e.g., camera, PCIe module), use a power source capable of ≥3A continuous current.
First Boot & Software Environment
Pi Vision supports Raspberry Pi OS and Clea OS (Linux-based, optimized for industrial applications, remote management, and secure orchestration).
-
Power On: Once power is applied, the device will automatically boot.
-
Select Boot Source:
Depending on the model, Pi Vision will boot from:
• eMMC storage (standard CM5)
• microSD card (CM5 Lite) -
Operating System Options:
• Clea OS (recommended): SECO’s Linux distribution designed for industrial use, remote management, OTA updates (via Edgehog), and integration with Clea Portal.
• Raspberry Pi OS: Debian-based, ideal for general Raspberry Pi applications. -
Initial Configuration:
• Connect to a monitor (if required) and complete basic OS setup: language, timezone, Wi-Fi.
• For Clea OS, register the device on Clea Portal to access updates, deploy AI workloads, or monitor system health.
• SSH access is enabled by default for remote configuration.
For further setup — such as installing a new operating system, enabling remote management, or customizing your environment — please refer to the extended documentation and additional Get Started guides.
Power and Thermal Considerations
- Power Input: 5V DC via USB-C (3A minimum)
- The aluminum enclosure acts as a passive heatsink, ensuring fanless operation.
- Avoid obstructing ventilation openings or placing the device near heat sources.
- Operating range: 0 °C to +60 °C
- For high-load scenarios or enclosed spaces, ensure airflow and use approved mounting kits.
Recovery and Reflashing
If you need to reinstall or recover the operating system:
- Power off the unit.
- Insert a microSD card with the official recovery image.
- Connect power to start the reflashing process.
- Follow on-screen instructions to restore Clea OS or Raspberry Pi OS.
Recovery images are available at: developer.seco.com
Next Steps & Resources
- Full documentation, drivers, and software tools are available on the SECO Developer Center: developer.seco.com
- For Clea OS setup and device management guides, refer to: Clea Portal Documentation
- For tutorials and quick start videos, scan the QR code included in your kit or visit the SECO YouTube channel.
Support
Need assistance?
Visit www.seco.com or contact SECO Technical Support for:
- OS images and updates
- Hardware documentation
- Clea integration guides
- Replacement accessories and add-ons