Palladio 500 RPL
Welcome to your Palladio 500 RPL. This guide is designed to walk you through everything you need to know to get started: from understanding your new device, to installing and configuring it for your specific industrial or AI-based project.
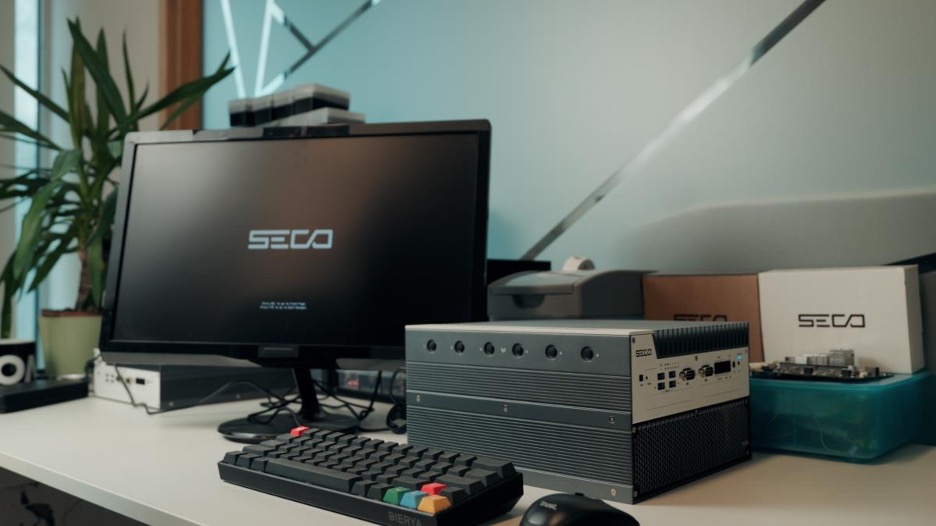
The Palladio 500 RPL is a rugged, embedded computer built to deliver top performance in harsh industrial environments. Designed for 24/7 operation, it offers flexibility, modularity, and the computational power of Intel's 13th Gen Core processors, all packed into a compact form factor. Whether you're deploying it for smart manufacturing, edge AI, or industrial control systems, this guide will help ensure your first setup goes smoothly.
Before You Begin
What's in the Box?
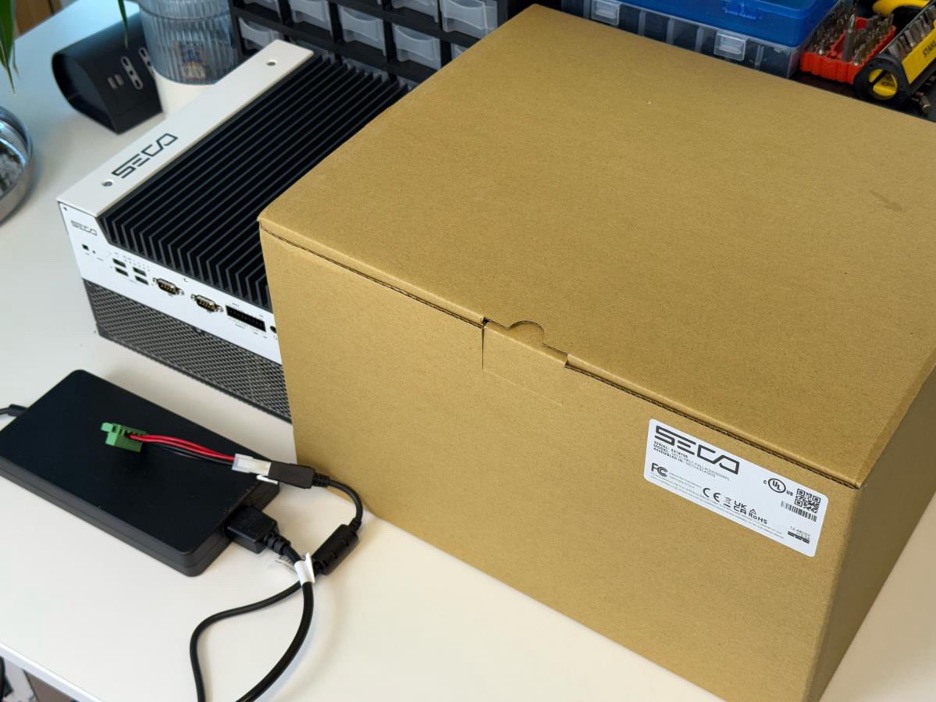
Inside your Palladio 500 RPL package, you should find:
- The device itself
- A power terminal block connector (5-pin)
- Optional brackets for DIN rail or wall mounting
- Cable accessories and connectors
- Product documentation (warranty, declaration of conformity)
If you ordered specific optional kits (like the 4G/LTE module, cooling fan, or additional USB/COM ports), they will be included as separate components.
Essential Peripherals (You'll Need These – Not Included)
To get started, you will need:
- Power Supply: A 12-48 VDC power supply. If your unit includes high-power PCIe modules, ensure your power source supplies at least 20 VDC.
- Display (If applicable): A monitor with DisplayPort input. An HDMI-to-DP adapter can also be used.
- Input Devices (If applicable): A USB keyboard and mouse.
- Operating System (OS) (If not pre-loaded/re-installing): If your device is not preloaded with Clea OS or if you intend to install Windows, you'll need your chosen OS image on a bootable USB drive.
- Network Cable (If applicable): An Ethernet cable for wired network access.
Safety First!
Before proceeding with installation, please:
- Read the full safety warnings included in the manual.
- Ensure you are operating within the permitted environmental conditions:
- Temperature: -40°C to +70°C (for 35W CPUs), -40°C to +50°C (for 65W CPUs)
- Humidity: 0-95%, non-condensing
- Avoid exposure to liquids, corrosive materials, or flammable substances.
- Always leave at least 2 inches of space around the unit for proper cooling.
Hardware Overview & Connections

At its core, the Palladio 500 RPL is a highly modular industrial PC. It's equipped with 13th Gen Intel Core processors (i3, i5, i7, i9 options available), with up to 24 cores and 32 threads depending on the model. You can install up to 32 GB of DDR4 RAM, and leverage high-performance graphics thanks to the integrated Intel UHD Graphics 770 (available on most CPUs). The system is fanless, which makes it perfect for environments where dust or mechanical reliability is a concern. Despite the lack of fans, it's designed with an optimized heatsink to dissipate heat efficiently.
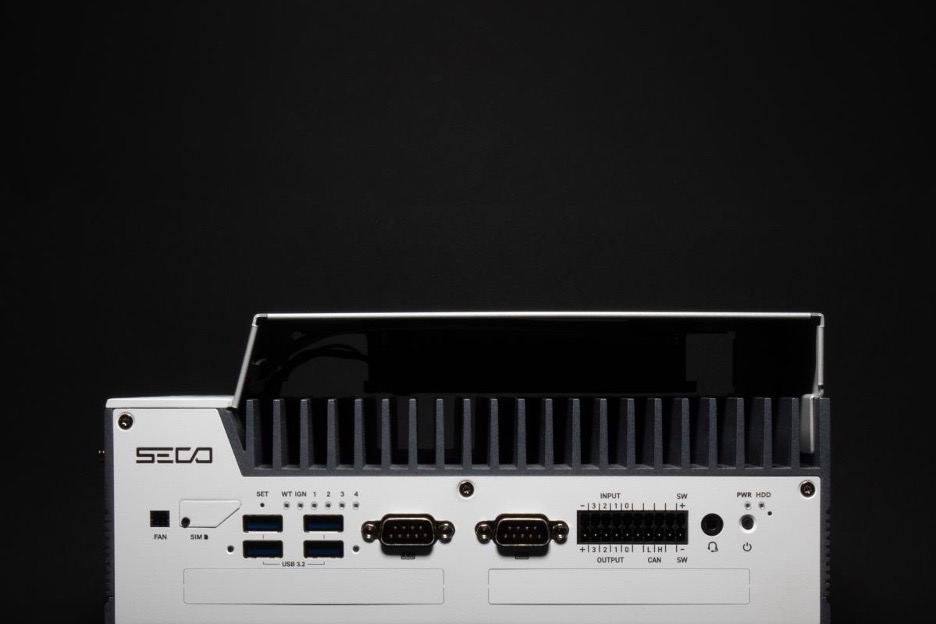
Key Ports and Connectors:
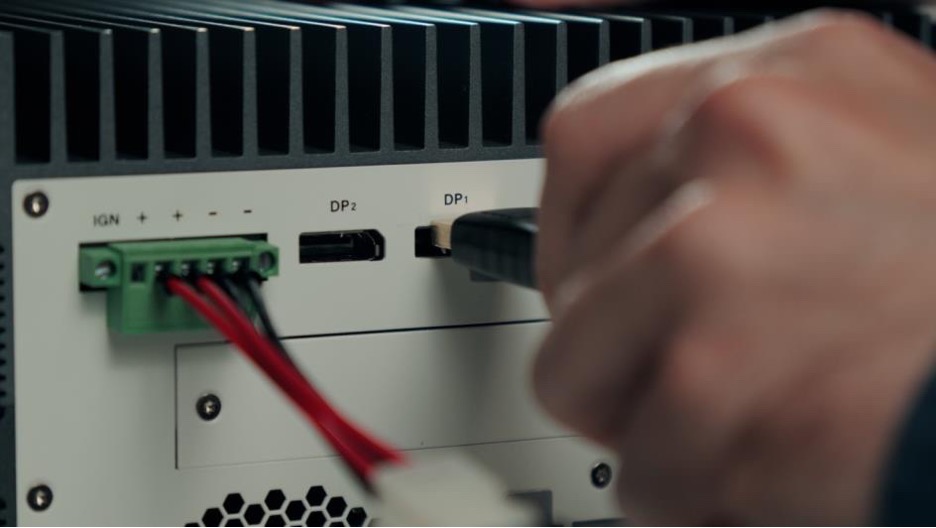
- Power Input: Rear 5-pin terminal for 12-48 VDC input.
- Display Output(s): 2x DisplayPorts supporting up to 4K@60Hz.
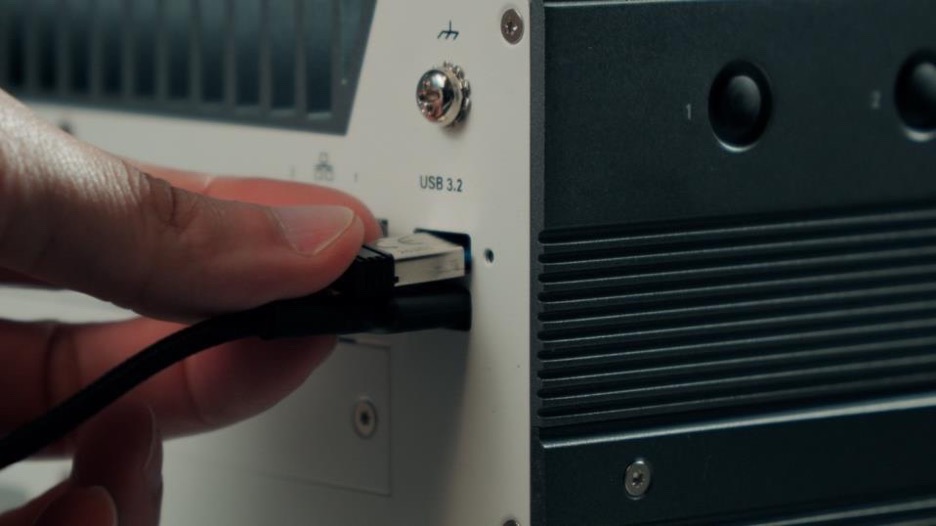
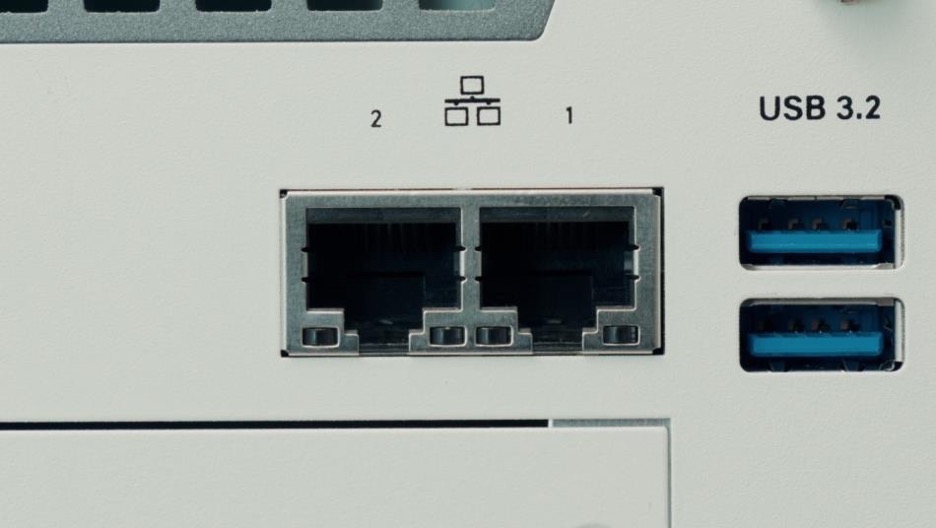
- USB Ports: 6x USB 3.2 Gen 2 ports (4 Type A front panel and 2 Type A back panel).
- Network (LAN) Port(s): 2x or 6x 2.5GbE LAN ports (with optional PoE).
- Serial Port(s): 2x COM RS-232/422/485 ports
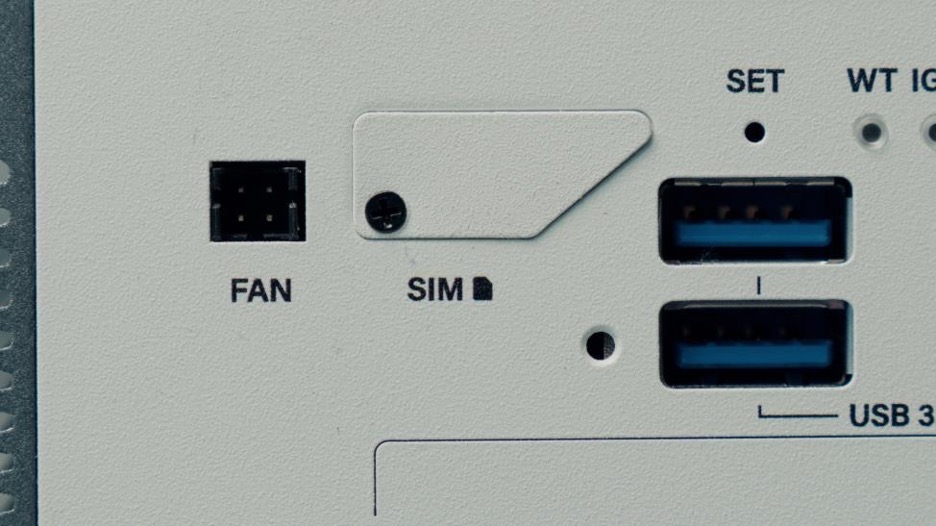
- SIM Card Slot(s): Micro SIM slots for cellular access.
- Storage Interfaces:
- 2x SATA 2.5" drives (hot-swappable optional)
- 3x M.2 2280 SSDs (PCIe Gen 4 x4 and SATA support)
- GPIO Ports: 1x GPIO terminal block (DIO, CAN, Ext. Switch)
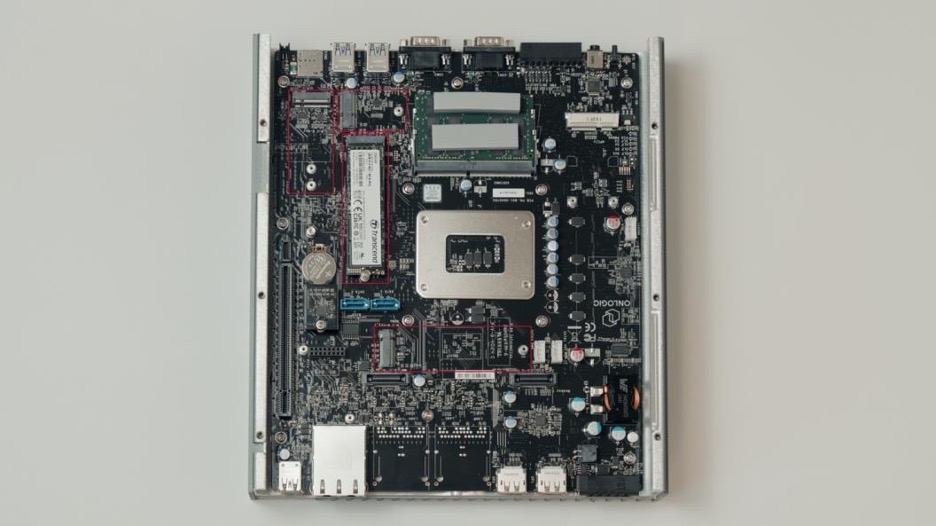
Internal Expansion:
The Palladio 500 RPL provides:
- RAM: Up to 32 GB of DDR4 RAM.
- Storage:
- 2x SATA 2.5" drives (hot-swappable optional)
- 3x M.2 2280 SSDs (PCIe Gen 4 and SATA support)
- Expansion Slots: Multiple internal expansion options (M.2, mPCIe, and full PCIe Gen 4 x16 or dual x8). (
- Wireless Connectivity: Dedicated options for Wi-Fi and Bluetooth modules.
Refer to the main User Manual for detailed instructions on accessing internal components and installing modules/drives.
Physical Installation
Before you begin, ensure all power sources are OFF.
DIN Rail Mounting
- Ensure all power sources are OFF.
- Align the device with the DIN rail and push until it locks into place.
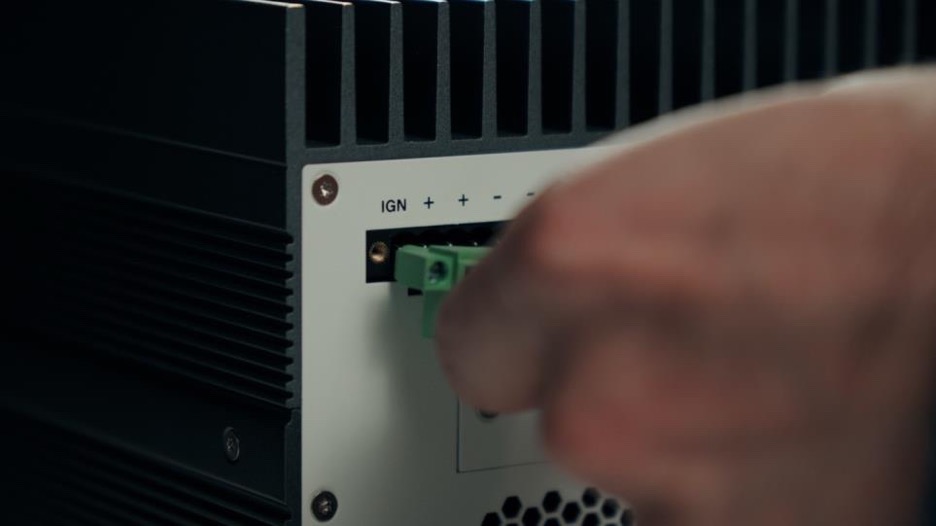
- Connect the 5-pin power terminal securely and turn clockwise to lock.
Wall Mounting
- Again, power OFF first.
- Use six M4x0.5mm flat head screws to fix the unit to the mounting plate. Adjust screw length based on bracket thickness.
- Connect to power and begin wiring external devices (LAN, USB, serial ports, displays, etc.).
Connecting Peripherals and Power
- Power: Connect the 12-48 VDC input to the rear 5-pin terminal. If your unit includes high-power (70W+) PCIe modules, ensure your power source supplies at least 20 VDC.
- Display: Use DisplayPort or an HDMI-to-DP adapter.
- Keyboard & Mouse: Connect keyboard and mouse to any USB 3.2 port.
- Network: Use 2.5 GbE ports for Ethernet; PoE is supported if configured.
- SIM Card (If applicable, only for Cellular models):
- Ensure the device is powered off.
- Open the SIM card slot cover.
- Insert SIM cards for LTE modules if present.
- Close the SIM card slot cover.
First Boot & Software Environment
- Powering On: Once all peripherals are connected and the power supply is securely attached, press the power button.
- Initial Boot: Observe the LED indicators. The Power LED should illuminate. You should see boot messages on your connected display.
- Operating System:
- Preloaded OS: The Palladio 500 RPL typically comes preloaded with Clea OS, SECO's secure, Yocto Linux-based OS optimized for containerized applications via Docker.
- Installing an OS: You can also install Windows if needed.
- Ensure your bootable OS installation media (e.g., USB drive) is connected.**
- Power on (or restart) the device.
- Access the BIOS/UEFI settings.
- In the BIOS/UEFI, navigate to the "Boot" section and set your installation media as the primary boot device.
- Save changes and exit. The system will now boot from your installation media. Follow the OS installation instructions.
- Drivers (If applicable): If you installed your own OS, you might need to install specific drivers for the Palladio 500 RPL's hardware components. These can be downloaded from www.seco.com – please check section “References and Useful Links” below.
On first boot:
- Make sure the operating system is up to date.
- Read more on and set up your connection to a Clea instance – please check section “References and Useful Links” below.
- Load or deploy your AI applications via Clea's SDK or web tools.
Features like remote configuration, device monitoring, and secure software deployment are available out-of-the-box when using Clea OS.
Basic Configuration / Connecting to [Network/Clea Cloud]
-
Connecting to Clea instance:
- The Palladio 500 RPL typically comes preloaded with Clea OS.
- Use Clea Portal or Device Manager for software configuration.
- Features like remote configuration, device monitoring, and secure software deployment are available out-of-the-box.
Basic Troubleshooting
- Cleaning: Power off the device before cleaning. Use only a dry cloth.
- Ventilation: The device is fanless but relies on its heatsink for cooling. Do not obstruct airflow around the chassis.
- Software Updates: For the latest drivers and software updates, please visit seco.com.
For more detailed troubleshooting, refer to the main User Manual or contact support.
Maintenance & Support
- To clean: power off the unit and use a dry cloth.
- Monitor system health via Clea or internal sensors.
- Use only certified spare parts and authorized service partners.
- Dispose of the product according to WEEE regulations.
- Firmware/Software Updates: Regularly check www.seco.com for firmware and software updates
Optional Accessories & Next Steps
Optional Accessories
Expand your system with:
- 4G/LTE EU or US kits + antennas
- Wi-Fi/Bluetooth modules
- Axelera AI accelerator
- 330W power adapter
- Wall and DIN mounting kits
- Additional USB or serial port kits
Next Steps
- Full User Manual: For in-depth information, advanced configurations, and technical specifications, please refer to the full User Manual available at: www.seco.com
Need Help?
Still Have Questions? Contact SECO support or visit www.seco.com for detailed documentation, drivers, and software tools.